Customization
Announcements
To add an announcement message that appears at the top of the dashboard you can create a file at /etc/ood/config/announcement.(md|yml) or /etc/ood/config/announcements.d/any_file_name.(md|yml).
On each request the dashboard will check for the existence of this file. If it exists, the contents will be converted using markdown converter to HTML and displayed inside a bootstrap alert.
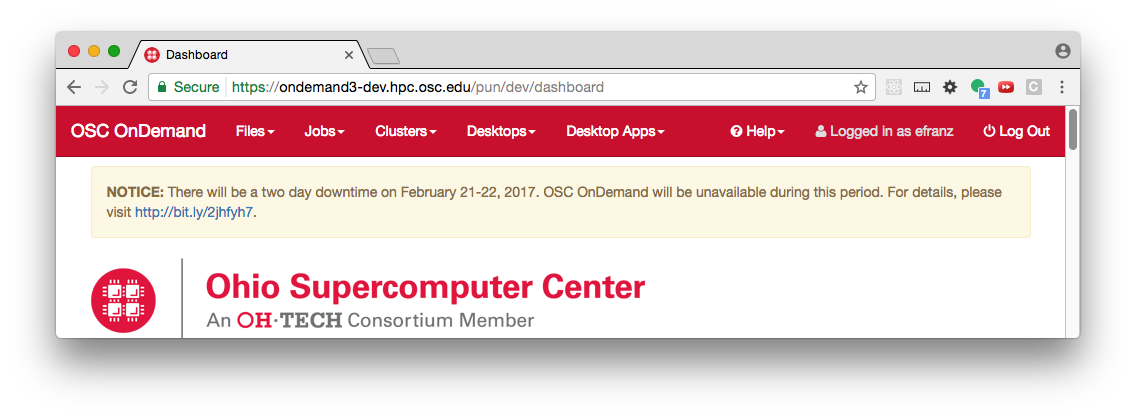
For example, if I create an announcement.md file with the contents:
**NOTICE:** There will be a two day downtime on February 21-22, 2017. OSC
OnDemand will be unavailable during this period. For details, please visit
[http://bit.ly/2jhfyh7](http://bit.ly/2jhfyh7).
the user would see this message at the top of the dashboard:

Fig. 1 Example of the Dashboard announcement.
If the announcement file has the extension yml and is a yaml file it is first rendered using ERB and then the resulting file is parsed as YAML. The valid keys are:
| type | warning, info, success, or danger | this is the Bootstrap alert style |
|---|---|---|
| msg | string containing markdown formatted message | if this is a blank string (only whitespace), the alert will not display |
Because the announcement is rendered via ERB you can do some interesting things, like stop showing the announcement past a specified date:
type: warning
msg: |
  <% if Time.now < Time.new(2018, 9, 24, 12, 0, 0) %>
  A **Ruby Partial Downtime** for 4 hours on Monday, September 24 from 8:00am to 12:00pm
  will prevent SSH login to Ruby nodes and and Ruby VDI sessions.
  <% end %>
Note
Warnings about the announcement file being missing may be present in users’ nginx logs. Despite the warning the Dashboard will still function normally without those files being present.
Message of the Day (MOTD)
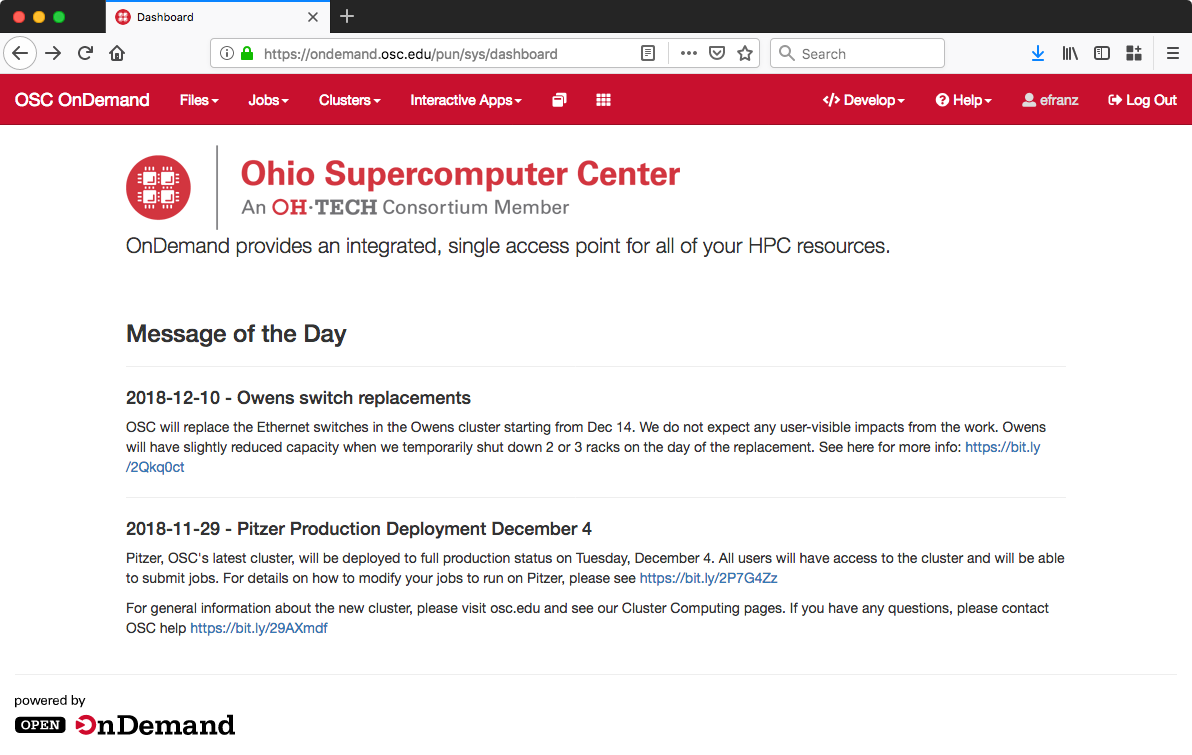
You can configure the Dashboard to display the /etc/motd file on the front page - the same file that is displayed when ssh-ing to a login node.
To display a MOTD file on the Dashboard ensure that the environment variables $MOTD_PATH and $MOTD_FORMAT are set, where
MOTD_PATH="/etc/motd" # this supports both file and RSS feed URIs
MOTD_FORMAT="txt" # markdown, txt, rss

Fig. 2 Message of the Day appears in the body of the index page.
We recommend setting this in /etc/ood/config/apps/dashboard/env.
Branding
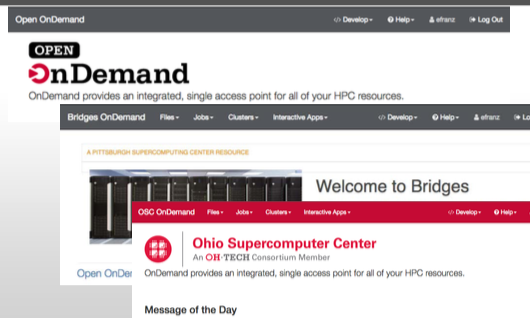
You can customize the logo, favicon, title, and navbar colors of OnDemand.

We recommend setting these environment variables in /etc/ood/config/nginx_stage.yml as YAML mappings (key value pairs) in the mapping (hash/dictionary) pun_custom_env. Alternatively you can set these in the env files of the dashboard and the apps. Currently only the dashboard uses the colors in the navbar.
| Feature | Environment Variable | Details |
|---|---|---|
| Title | OOD_DASHBOARD_TITLE | The title appears in the navbar and is controlled by the environment variable $OOD_DASHBOARD_TITLE. The default value is “Open OnDemand”. |
| Logo | OOD_DASHBOARD_LOGO | The default value for OOD_DASHBOARD_LOGO is /public/logo.png and this should be the URL to the logo. By default if you place a logo.png at /var/www/ood/public/logo.png it will be accessible via the URL https://your.ondemand.institution.edu/public/logo.png. |
| Favicon | OOD_PUBLIC_URL | The favicon is expected to exist at the path $OOD_PUBLIC_URL/favicon.ico. For a default OOD installation the favicon will be located at /var/www/ood/public/favicon.ico. |
| Brand background color | OOD_BRAND_BG_COLOR | Controls the background color of the navbar in the dashboard |
| Brand foreground color | OOD_BRAND_LINK_ACTIVE_BG_COLOR | Controls the background color the active link in the navbar in the dashboard |
| Replace header title with logo | OOD_DASHBOARD_HEADER_IMG_LOGO | Value should be url to logo i.e. /public/logo.png. the background color the active link in the navbar in the dashboard |
| Use white text on black background for navbar. | OOD_NAVBAR_TYPE | By default we use inverse for this value, which specifies to use Bootstrap 3’s inverted navbar where text is white and background is black (or dark grey). You can set this to default to use black text on light grey background if it fits your branding better. |

Fig. 3 Nav bar if I set OOD_BRAND_BG_COLOR to #0000ff and OOD_BRAND_LINK_ACTIVE_BG_COLOR to #ff0000 and OOD_DASHBOARD_TITLE to OSC OnDemand
Warning
If setting in nginx_stage.yml, careful to set the value using quotes i.e. OOD_BRAND_BG_COLOR: '#0000ff'. If you omit the quotes, YAML will see # as a comment and the value of the OOD_BRAND_BG_COLOR will be nil
Whitelist directories
By setting a colon delimited WHITELIST_PATH environment variable, the Job Composer, File Editor, and Files app respect the whitelist in the following manner:
- Users will be prevented from navigating to, uploading or downloading, viewing, editing files that is not an eventual child of the whitelisted paths
- Users will be prevented from copying a template directory from an arbitrary path in the Job Composer if the arbitary path that is not an eventual child of the whitelisted paths
- Users should not be able to get around this using symlinks
We recommend setting this environment variable in /etc/ood/config/nginx_stage.yml as a YAML mapping (key value pairs) in the mapping (hash/dictionary) pun_custom_env i.e. below would whitelist home directories, project space, and scratch space at OSC:
pun_custom_env:
  WHITELIST_PATH: "/users:/fs/project:/fs/scratch"
Warning
This is not yet used in production at OSC, so we consider this feature “experimental” for now.
Warning
This whitelist is not enforced across every action a user can take in an app (including the developer views in the Dashboard). Also, it is enforced via the apps themselves, which is not as robust as using cgroups on the PUN.
Set default ssh host
In /etc/ood/config/apps/shell/env set the env var DEFAULT_SSHHOST to change the default ssh host. Otherwise it will default to “localhost” i.e. add the line DEFAULT_SSHHOST="localhost".
This will control what host the shell app ssh’s to when the URL accessed is /pun/sys/shell/ssh/default which is the URL other apps will use (unless there is context to specify the cluster to ssh to).
Custom Job Composer Templates
Below explains how job templates work for the Job Composer and how you can add your own. Here is an example of the templates we use at OSC for the various clusters we have
Job Templates Overview
“Job Composer” attempts to model a simple but common workflow. When creating a new batch job to run a simulation a user may:
- copy the directory of a job they already ran or an example job
- edit the files
- submit a new job
“Job Composer” implements these steps by providing the user job template directories and the ability to make copies of them: (1) Copy a directory, (2) Edit the files, and (3) Submit a new job.
- Copy a directory of a job already ran or an example job
- User can create a new job from a “default” template. A custom default template can be defined at
/etc/ood/config/apps/myjobs/templates/defaultor under the app deployment directory at/var/www/ood/apps/sys/myjobs/templates/default. If no default template is specified, the default is/var/www/ood/apps/sys/myjobs/example_templates/torque - user can select a directory to copy from a list of “System” templates the admin copied to
/etc/ood/config/apps/myjobs/templatesor under the app deployment directory at/var/www/ood/apps/sys/myjobs/templatesduring installation - user can select a directory to copy from a list of “User” templates that the user has copied to
$HOME/ondemand/data/sys/myjobs/templates - user can select a job directory to copy that they already created through “Job Composer” from
$HOME/ondemand/data/sys/myjobs/projects/default
- User can create a new job from a “default” template. A custom default template can be defined at
- Edit the files
- user can open the copied job directory in the File Explorer and edit files using the File Editor
- Submit a new job
- user can use the Job Options form specify which host to submit to, what file is the job script
- user can use the web interface to submit the job to the batch system
- after the job is completed, the user can open the directory in the file explorer to view results
Job Template Details
A template consists of a folder and a manifest.yml file.
The folder contains files and scripts related to the job.
The manifest contains additional metadata about a job, such as a name, the default host, the submit script file name, and any notes about the template.
name: A Template Name
host: ruby
script: ruby.sh
notes: Notes about the template, such as content and function.
In the event that a job is created from a template that is missing from the manifest.yml, “Job Composer” will assign the following default values:
nameThe name of the template folder.hostThe cluster id of the first cluster with a valid resource_mgr listed in the OOD cluster configscriptThe first.shfile appearing in the template folder.notesThe path to the location where a template manifest should be located.
Custom Error Page for Missing Home Directory on Launch
Some sites have the home directory auto-create on first ssh login, for example via pam_mkhomedir.so. This introduces a problem if users first access the system through OnDemand, which expects the existence of a user’s home directory.
In OnDemand <= 1.3 if the user’s home directory was missing a non-helpful single
string error would display. Now a friendly error page displays. This error page
can be customized by adding a custom one to /etc/ood/config/pun/html/missing_home_directory.html.
See this Discourse discussion for details.
Disable Safari Warning on Dashboard
We currently display an alert message at the top of the Dashboard mentioning that we don’t currently support the Safari browser. This is because of an issue in Safari where it fails to connect to websockets if the Apache proxy uses Basic Auth for user authentication (on by default for new OOD installations).
If you ever change the authentication mechanism to a cookie-based mechanism (e.g., Shibboleth or OpenID Connect), then it is recommended you disable this alert message in the dashboard.
You can do this by modifying the /etc/ood/config/apps/dashboard/env file as such:
DISABLE_SAFARI_BASIC_AUTH_WARNING=1
Disk Quota Warnings on Dashboard
You can display warnings to users on the Dashboard if their disk quota is nearing its limit. This requires an auto-updated (it is recommended to update this file every 5 minutes with a cronjob) JSON file that lists all user quotas. The JSON schema for version 1 is given as:
{
  "version": 1,
  "timestamp": 1525361263,
  "quotas": [
    {
      ...
    },
    {
      ...
    }
  ]
}
Where version defines the version of the JSON schema used, timestamp
defines when this file was generated, and quotas is a list of quota objects
(see below).
You can configure the Dashboard to use this JSON file (or files) by setting the
environment variable OOD_QUOTA_PATH as a colon-delimited list of all JSON
file paths in the /etc/ood/config/apps/dashboard/env file.
The default threshold for displaying the warning is at 95% (0.95), but this
can be changed with the environment variable OOD_QUOTA_THRESHOLD.
An example is given as:
# /etc/ood/config/apps/dashboard/env

OOD_QUOTA_PATH="/path/to/quota1.json:/path/to/quota2.json"
OOD_QUOTA_THRESHOLD="0.80"
Individual User Quota
If the quota is defined as a user quota, then it applies to only disk
resources used by the user alone. This is the default type of quota object and
is given in the following format:
Warning
A block must be equal to 1 KB for proper conversions.
Individual Fileset Quota
If the quota is defined as a fileset quota, then it applies to all disk
resources used underneath a given volume. This requires the object to be
repeated for each user that uses disk resources under this given volume.
The format is given as:
{
  "type": "fileset",
  "user": "user1",
  "path": "/path/to/volume2",
  "block_usage": 500,
  "total_block_usage": 1000,
  "block_limit": 2000,
  "file_usage": 1,
  "total_file_usage": 5,
  "file_limit": 10
}
Where block_usage and file_usage are the disk resource usages attributed to
the specified user only.
Note
For each user with resources under this fileset, the above object will be repeated with just user, block_usage, and file_usage changing.
